
If you have been following me on social media, you know that I recently experienced a horrific accident that involved my three year-old son, a pair of thread snips, and a lovely red sheath dress. You can read more about that here!
The short of it . . . he made all sorts of cuts on the dress beneath the crotch.
Today, I would like to share my knowledge and ideas on how you can repair clothing that has been accidentally damaged with cuts, holes, and/or tears. I have been sewing for over 15 years now, and I have only had to mend garments with cuts three times. I have been very blessed! Nevertheless, accidents happen! So I’ve prepared a list of eight sewing tips for mending cuts in your garments.
1.Use your sewing machine’s stitch patterns to make designs and hide the holes, cuts, or tears.
The very first time I’ve experienced having a hole, tear, or cut in a garment was not too long ago. I was putting the finishing touches on a beautiful magenta button-up top I had made. It was about 11pm, and I remember feeling absolutely exhausted and thinking I should go to bed and finish this tomorrow. I was determined to finish the project, though; I had plans to wear the shirt to church the next day, and I wanted it to be done. Although I was feeling exhausted and sleepy, I ignored these feelings and did not go to bed. As you can imagine it was a decision that I have since regretted!
As I previously mentioned, I was adding the finishing touches to the top – buttonholes and buttons. After I finished sewing on the buttonholes, I grabbed my seam ripper so I could open up the buttonholes. I did not realize that I had the main part of the shirt folded underneath the buttonhole placket. So as I was making slits in the buttonholes I was also cutting into the main part of the shirt as well. I know what you’re thinking because I had the same thought myself several times! I should have just went to bed and finished the project the following day! But I didn’t! I cried, kicked myself, complained to my husband about how I was frustrated with sewing, and kicked myself some more. And after I finished complaining, crying, and pouting, the damage was still there staring me in the face!
What was I going to do to fix it? Would I find a solution? Accept the loss? Keep crying about it? Let it sit for several months and revisit the idea about fixing it at a latter date? Honestly, after crying for a few days, I wanted to just give up! And for a few months I actually did give up. I just couldn’t see a way to fix this project. An applique wouldn’t work because the cuts were made in an awkward place going down the entire shirt and about 1/2 inch away from the buttonhole placket.
Finally, I followed a fellow sewist advice and used my sewing machine’s stitch patterns to cover up the tears. Honestly, I did not have experience in this area at the time because I went YEARS without running into a problem such as this! So I was unfamiliar with how to go about fixing such problems. I was very fortunate to have a friend who knew more about this than I did. Oh, and YouTube was also an exceptional resource. Although this worked in this particular situation, this won’t work in every case, unfortunately. But don’t loose hope! There are several other things you can do to fix cuts, holes, and/or tears in your garment.
2.Whenever possible use an appliqué!
Appliqués are really great at covering up unwanted holes, cuts, and tears. Nowadays, most appliqués are iron on and very easy to apply to a garment. There are some really cool sew on appliqués out there too. Generally, I would only use an appliqué if the hole, tear, or cut is bigger than a quarter. Otherwise, I would use some other kind of method to hide or fix the issue. My most recent experience with using an appliqué would have been quite rewarding, if the cuts were not made near the crotch area. After my three year old son cut my Valentine’s Day Sheath Dress with thread snips, I was devastated. I honestly, didn’t think I could recover it. When I first realized that the dress had been cut, I think I was in shock for about two minutes. During that time I thought of several solutions and was hoping that my local craft store would carry an appliqué large and pretty enough to apply to this garment. Because I had two contrasting colors on the dress, I was worried that I would not find anything that would blend well and look as though the style was intentional. To my surprise, I found this beautiful floral black lace applique from Joann’s Fabric. Actually, I had a choice between two floral black lace appliqués.
Because the cuts were made in an awkward place, I decided to purchase more than one appliqué in order to make it look as if the placement of the appliqués were intentional and balanced. In theory, this would have worked wonderfully! In practice, it didn’t look appealing because the applique was just beneath the crotch area.
But as I mentioned before, this technique is a good one but won’t work in every case! So what else can one do besides using a pretty appliqué?
3. Buttons are a great detail and can hide small holes!
I don’t recommend adding tons of buttons to a garment that has large holes or many holes for that matter. But adding buttons to a garment with holes smaller than a nickel can add both detail and style to the garment. For example, if there’s a hole in the center of the shirt, you can cover it up using a medium to large button. Having one button in the center of the garment may look somewhat awkward. To remedy this issue, you can just simply measure the placement of the button and add more button above and below that button in equal distances. I hope that makes sense.
Some garments with large holes, cuts, and/or tears just can’t be repaired unless you completely refashion the garment, add trim, or use some other method to hide/fix the hole.
4. Use a pretty trim or gimp of some kind!
How wonderful is trim? I absolutely love trim and find any excuse to use it whenever I can. What I love about trim is it comes in all shapes and sizes, stretch and non stretch, wide and narrow, lace and ribbon etc…. I could go on and on about the various trim options. It really is a nice accessory!
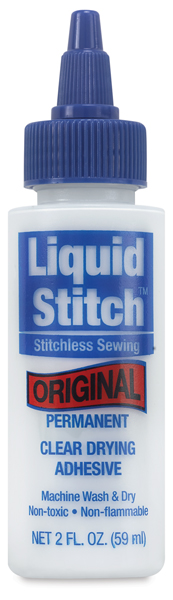
5. Needle & Tread, Fabric Fuse, Liquid Stitch, or Sewing Glue can help with most tears!
Sometimes you only need a needle and thread to fix a small hole, cut, or tear. For example, I had to repair a teal cardigan of mine that tore at the back of the neckline. Although the cut was almost the length of the entire back neckline, I only needed to hand sew it back together using the whipstitch technique. Thus, saving me time and money on making another garment.
In addition to using a needle and thread, you can also use Liquid Stitch sewing products to fix this issue too. Products such as Fabric Fuse, Liquid Stitch, and Sewing Glue can help with fusing the garment back together were it was once sewn/hemmed together. But just like the other methods I previously mentioned, these are not without their limitations. I would avoid using such products on larger holes (larger than a quarter).


6. Patchwork designs add detail and creativity to casual clothing!
There is also the possibility of getting creative and making your own appliqués and/or patchwork to apply to casual type clothing. Much like appliqués, patchwork designs have the ability to cover up an entire cut, hole, or tear large in size. I wouldn’t recommend doing patchwork on formal clothing because it might not look so great walking into your spouse’s formal work event wearing hearts and stars all over your shirt. However, it can be fun to create stars, hearts, circles, triangles, etc… and apply them to a garment. Again, this would probably be most appropriate for casual or kids’ clothing.
7. Refashion the garment into something totally different than you originally planned.
You can always try refashioning the garment into something totally new and different. I know! You worked so hard on that shirt, skirt, dress, pants etc…. But at this point you haven’t found anything that would work perfectly or even semi-perfectly! So, now it’s time to think more broadly and find a new way to utilize this garment. You could try shortening the hem, by cutting off three to four inches you might be able to get rid of the hole, cut, or tear entirely.
You could replace the three to four inches of fabric that you just cut with a different fabric to add contrast and detail to the hem of the shirt or dress.
If the hole, cut, or tear was made in the sleeve, you could remove the sleeves and add a contrast color to the sleeves. This is a common practice and makes for a really interesting garment style.
Lastly, you could use Fabric Fuse, as mentioned above, or interfacing to fuse the fabric together and prevent it from fraying. After applying the Fabric Fuse or interfacing, you can use a transparent lace overlay over the garment. Lace is a great choice because it is often transparent allowing the fabric underneath to be still visible and it adds to the overall beauty of the garment. In addition, it will likely hide any flaws or mistakes that may have happened while making the garment.
8. Consider replacing the entire damaged section.
Once I realized that the appliqués I purchased to conceal the cuts on the red sheath dress was not going to work out as I expected, I started to think of additional ways I could save the garment. I realized that I had over a yard and a half of fabric left over from this project. Initially, I didn’t want to undo all the seams and restart the project from the beginning; that is why I intended to use appliqués instead. Because the appliqués’ position was in an awkward place, it didn’t look natural. In fact, it looked very odd having an appliqué directly under the crotch. So, I just went to work ripping open all the seams and replacing the damaged front section of the dress with a new pattern cutout.

This is likely the best approach to take if you have extra fabric and time, and you do not mind seam ripping a garment for the better part of your day!
Unfortunately, we suddenly decided to move out of state during this time. Therefore, I was unable to dedicate much time to finishing this project. I did, however, remove the front section of the garment and replaced it with a new section. I am hoping to finish this project before the end of this summer. I will keep you all updated on my progress.
I really hope this post was helpful! There are indeed other ways in which you can repair a garment that has been severely damage. My other recommendations are…
Search the internet for other resources. YouTube is my best friend in such times.
Go to your local craft store with the garment in question and tell the associates at the cutting counter your problem; ask them what you could do to fix the issue. I have found that many sales associates at my local craft stores are/were longtime seamstresses who have experienced the same problems that I have at least once. They are generally very helpful in pointing me in the right direction, and sometimes they know exactly which products would help and others that I shouldn’t even waste my time and money on.
Lastly, be patient with yourself and know that some experiences are just learning experiences and nothing else. Sometimes we get caught up in making the “perfect garment” to wear to the “perfect event” putting unrealistic pressure on ourselves to complete a sewing project perfectly without realizing that we need to accept failure in order to become a master seamstress. Yes! I said that! We NEED to accept failure! Failure helps us learn! It’s ok if a project is unredeemable! It is ok if the garment is less than perfect! And it is ok if that beautiful Lolita dress didn’t turn out how you originally envisioned it. The truth of the matter is this…, sewing projects rarely turn out how we envision them in our mind. At least mine don’t!
Well those are my thoughts on how to repair a garment that has a hole, cut, and/or tear! Have you experienced this problem during your sewing journey yet? What do you do when faced with such difficulties? Do you have other recommendations that’s not listed here? I would love to hear them! Thanks for stopping by and taking the time to read this post! I hope it is was helpful! And don’t for get to like and comment, if you found this post helpful. Please follow my blog for other sewing tips!
Best wishes,
Tea

Leave a comment